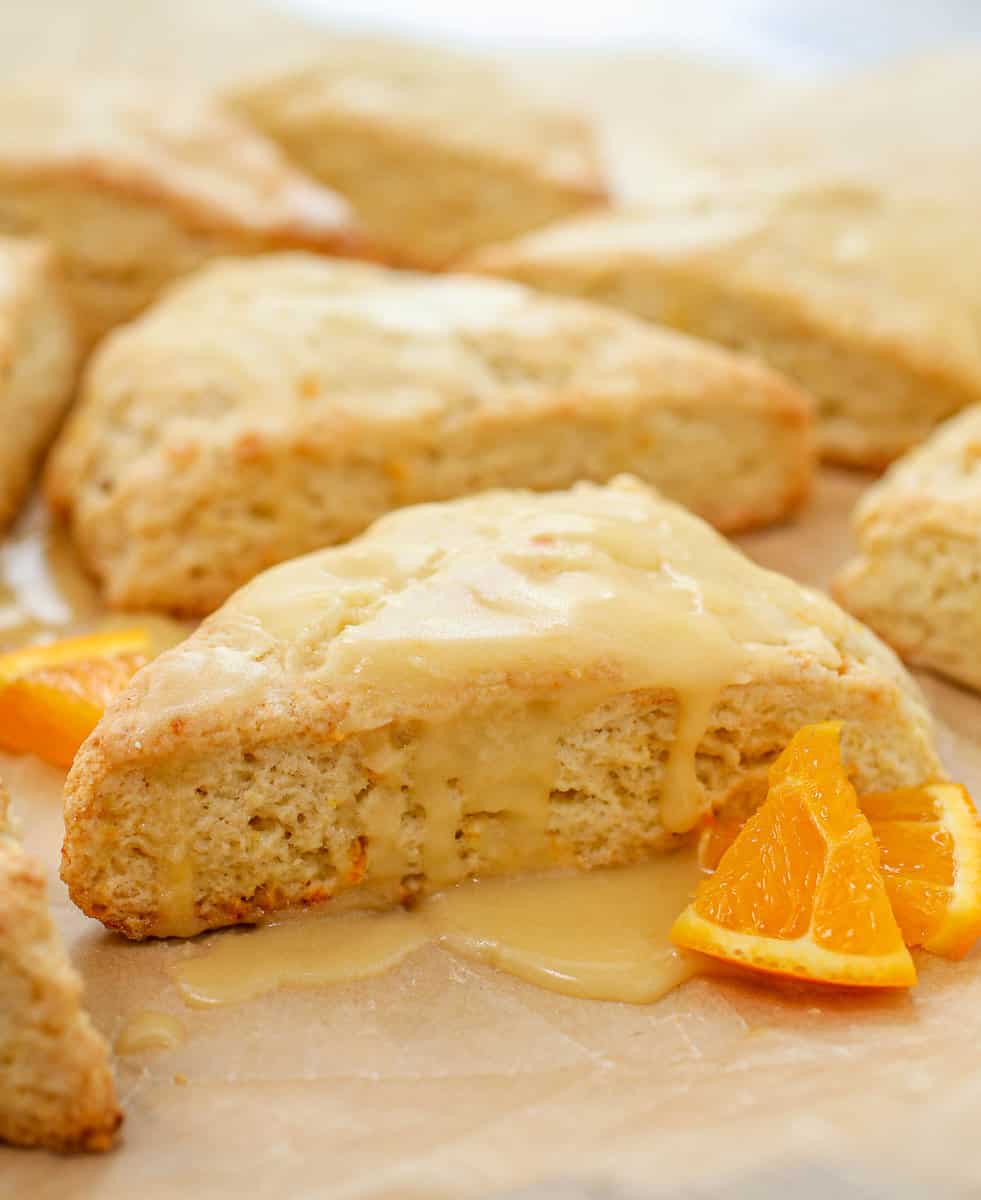
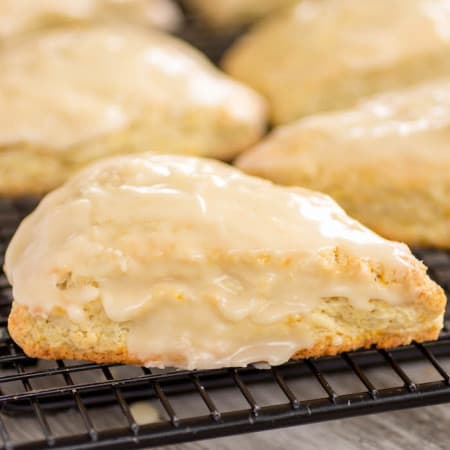
These perfectly tender, flaky Fresh Orange Scones have such a bright citrus flavor and are topped off with a sweet + tangy orange glaze.
I have been making these scones for years and they never fail to be loved by all who try them! Even the skeptics that say they don't like orange flavored desserts. I was one of those people until I started making these fresh orange scones and now they're one of my favorite things to make! They are just bursting with fresh orange flavor and have such a tender, flaky texture. They are absolute perfection.
Want to try your hand at some more scone recipes? Try my Raspberry White Chocolate Almond Scones or Cinnamon Scones.
Jump to:
Why you'll love this recipe
- The glaze on top is what truly brings everything together. It's sweet but tangy and it finishes these guys off perfectly.
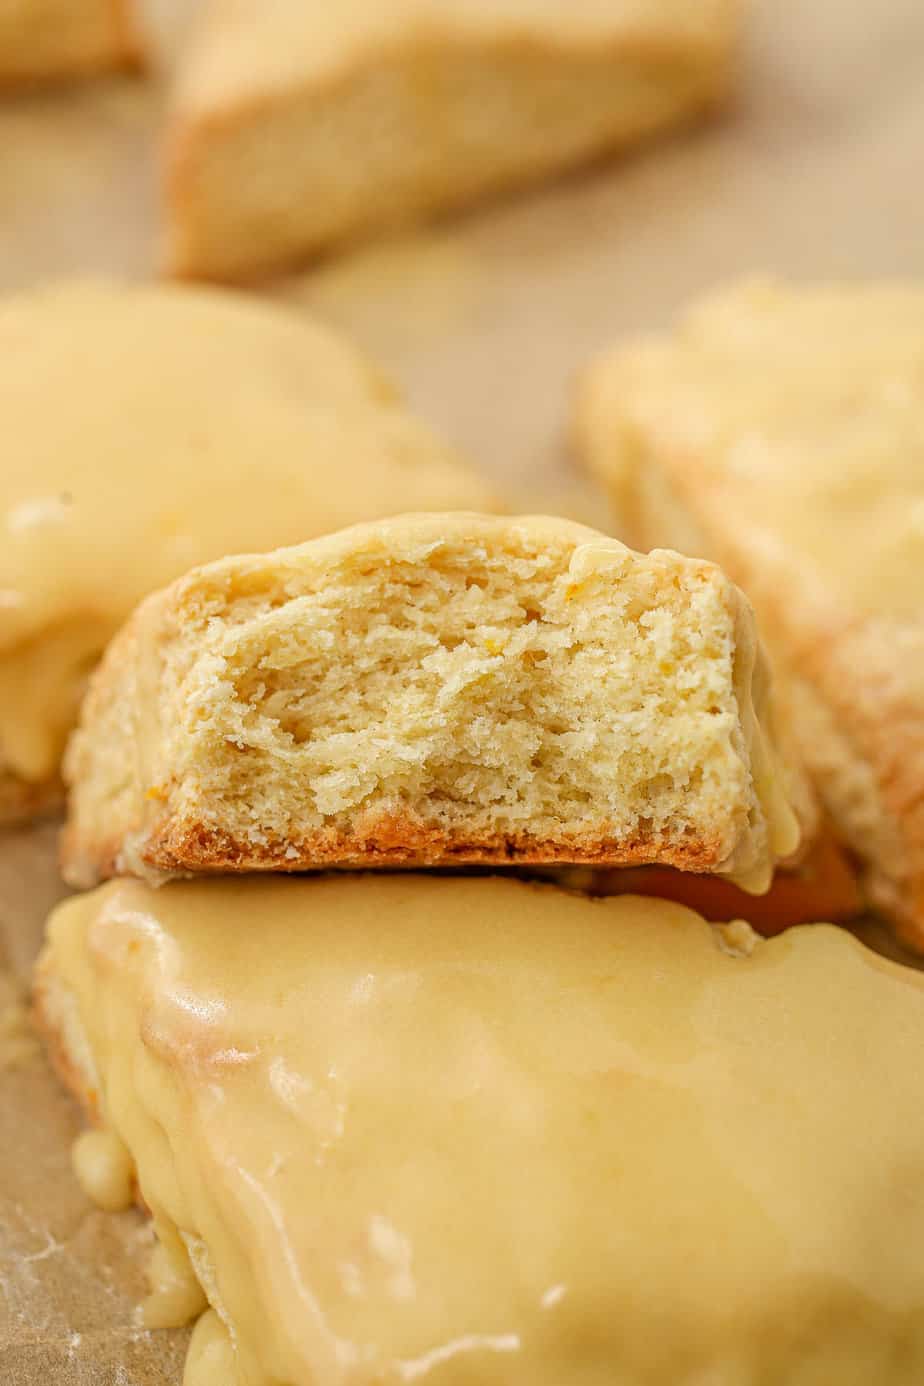
- They have the perfect scone texture - dense and slightly crumbly but soft and tender at the same time. Just like my lemon blueberry scones!
- These are neck and neck with Panera's orange scones. In my humble opinion, these are even better!
Ingredients needed
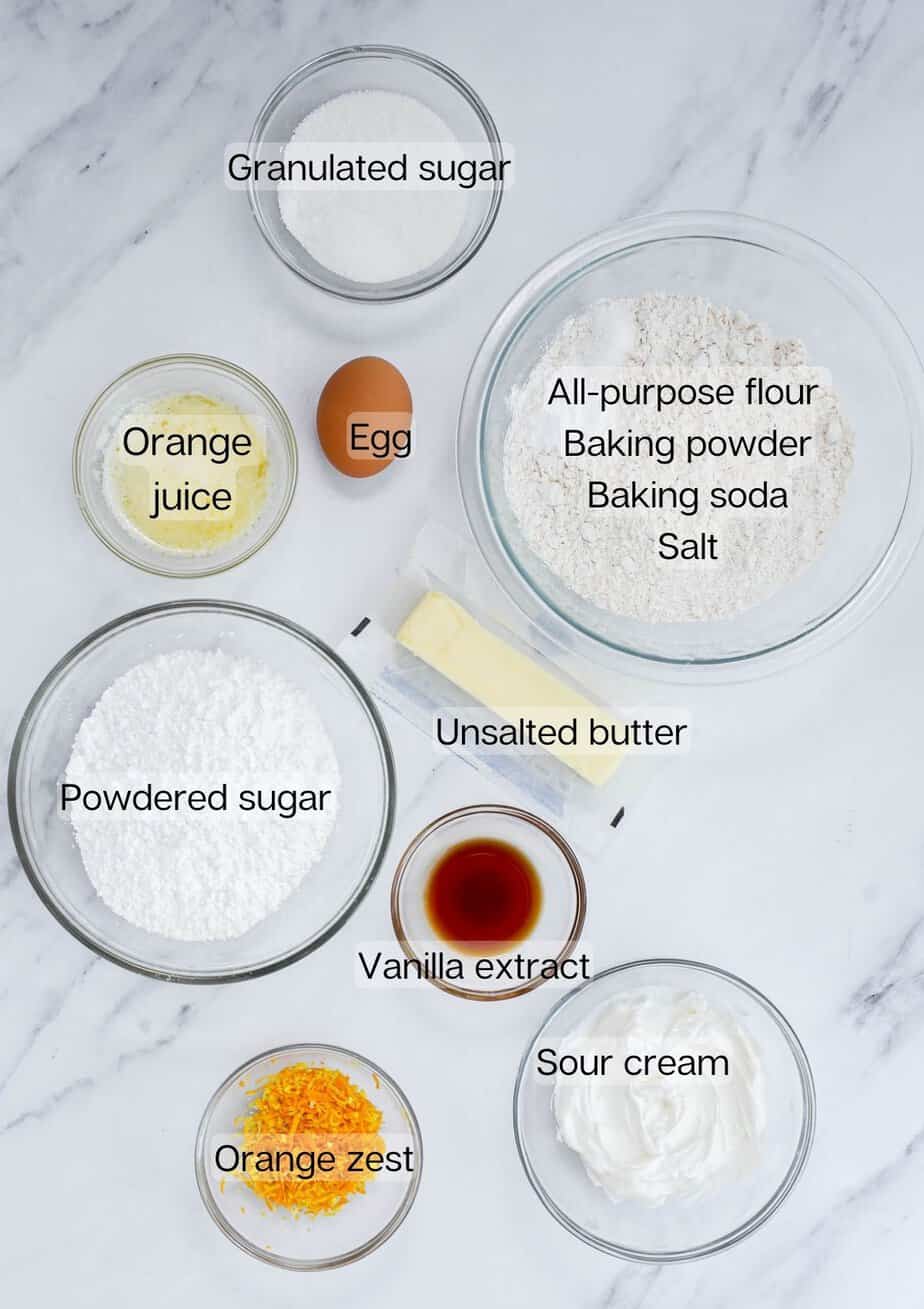
- Unsalted butter: Butter is incorporated by grating it while cold because it's much easier to distribute it evenly throughout the dough in tiny pieces.
- Orange juice: Freshly squeezed from the oranges that are being zested for this recipe.
See recipe card below for a full list of ingredients and easy-to-follow instructions.
Substitutions & Variations
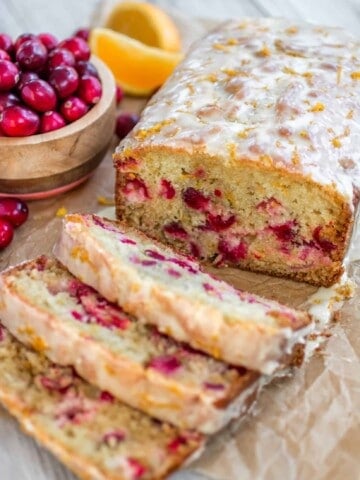
- Cranberry Orange Scones: Add 1 cup of dried cranberries.
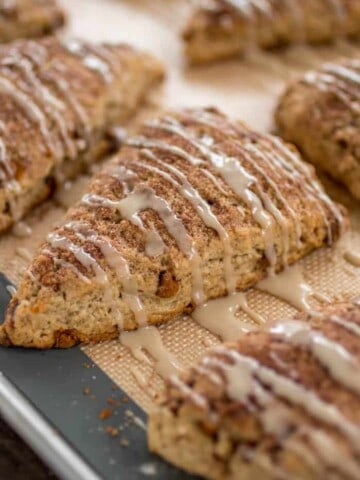
- Chocolate Orange Scones: Add ½ cup of chopped chocolate or mini chocolate chips. Drizzling melted chocolate on top would also be delicious!
- Blueberry Orange Scones: Add 1 cup of fresh or frozen blueberries to the dough. I have a lemon blueberry scone recipe that uses this same delicious basic scone dough as the base.
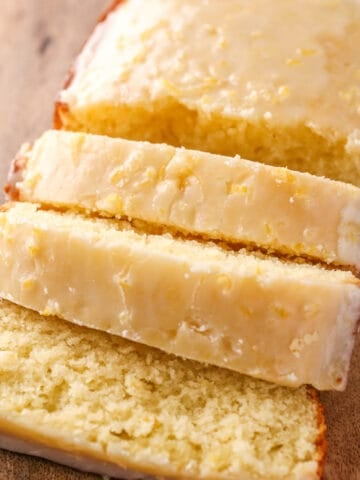
- Fresh Lemon Scones: Substitute lemon zest and juice for the orange zest and juice.
How to make Fresh Orange Scones
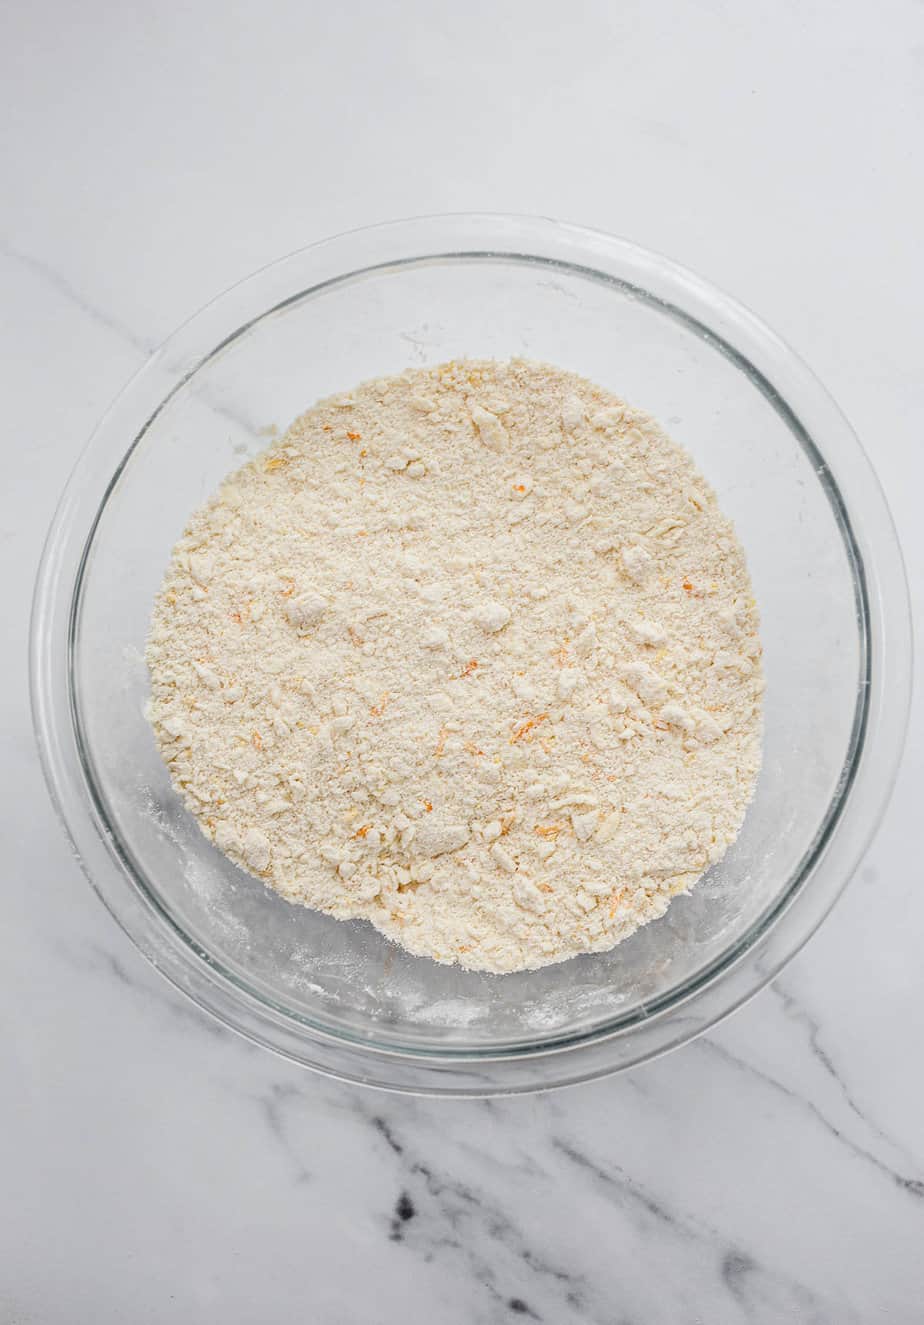
Step 1: Whisk flour, sugar, baking powder, baking soda, salt and lemon zest. Set aside.
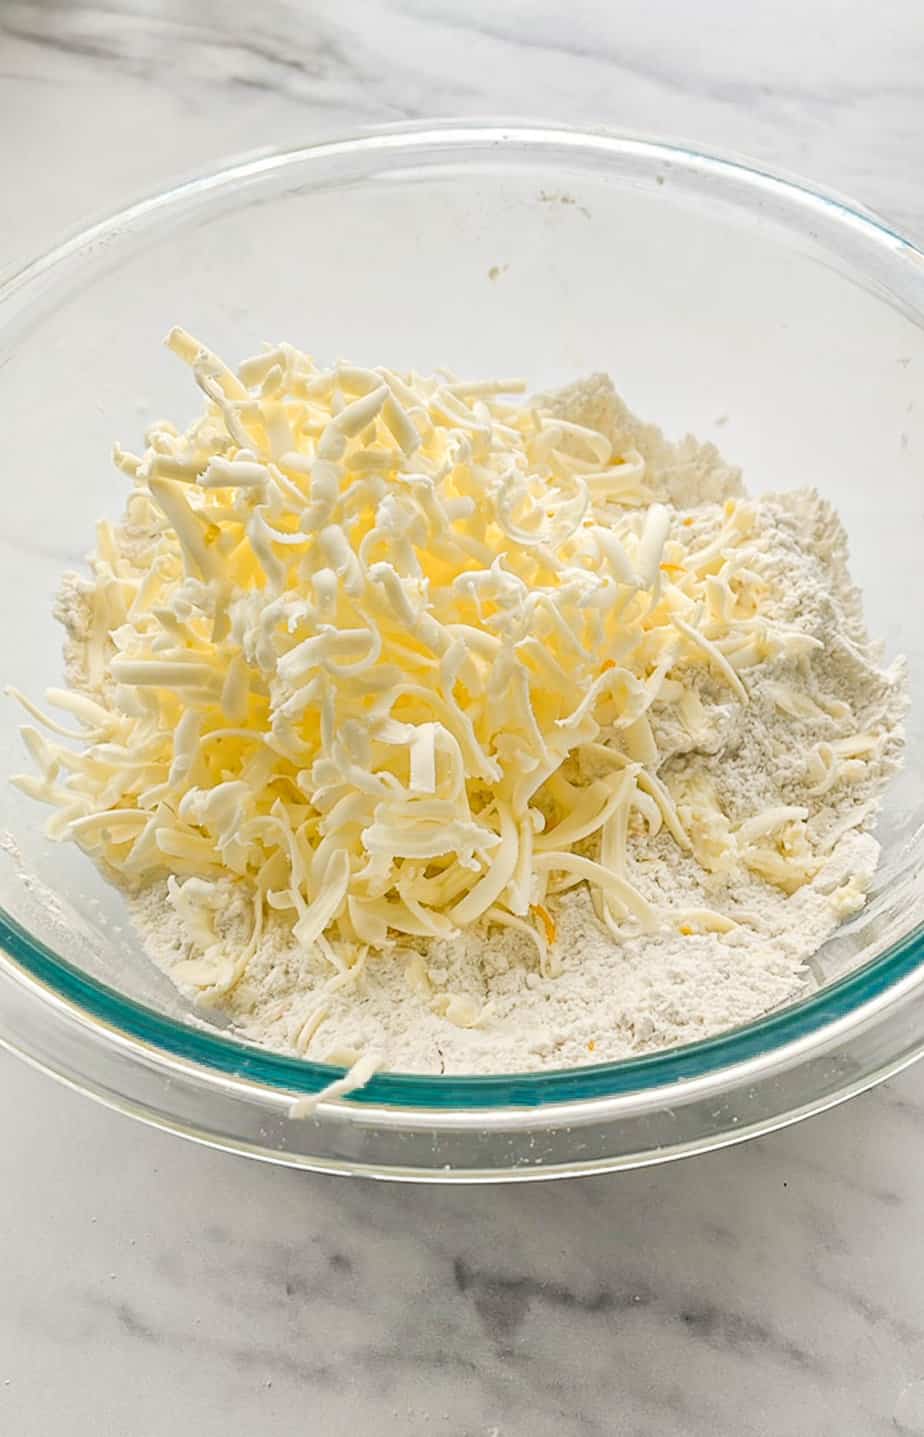
Step 2: Grate frozen butter into flour mixture. Using your hands, work in the butter until the texture resembles a coarse meal.

Step 3: Whisk together sour cream & egg and gently add to flour mixture.

Step 4: Gently stir until just combined being careful not to over-work the dough or squish the blueberries. Dough will be sticky and crumbly at first but will come together as you form it.
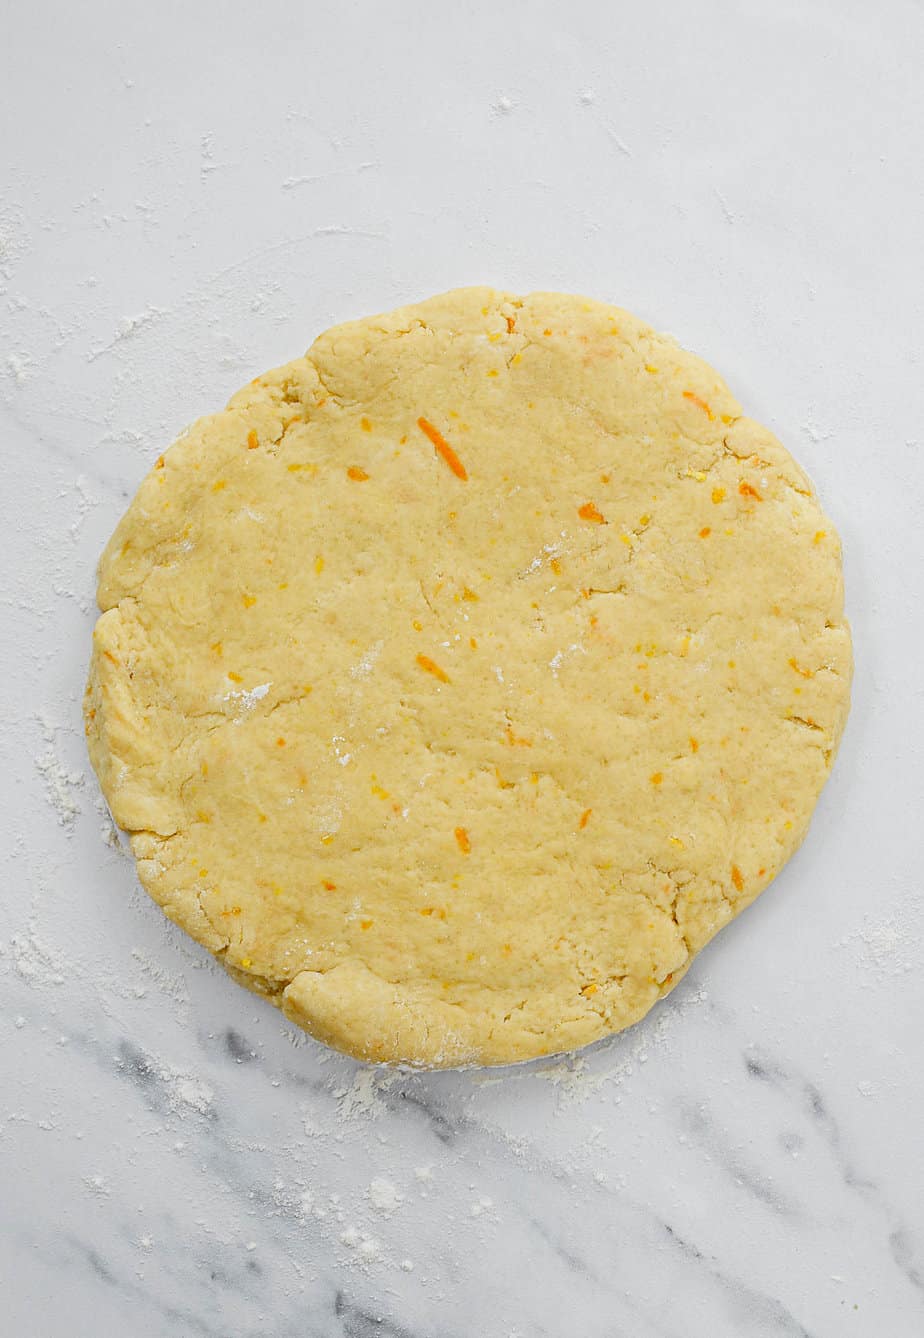
Step 5: Pat dough on a lightly floured surface into an 8" circle about ¾" thick.
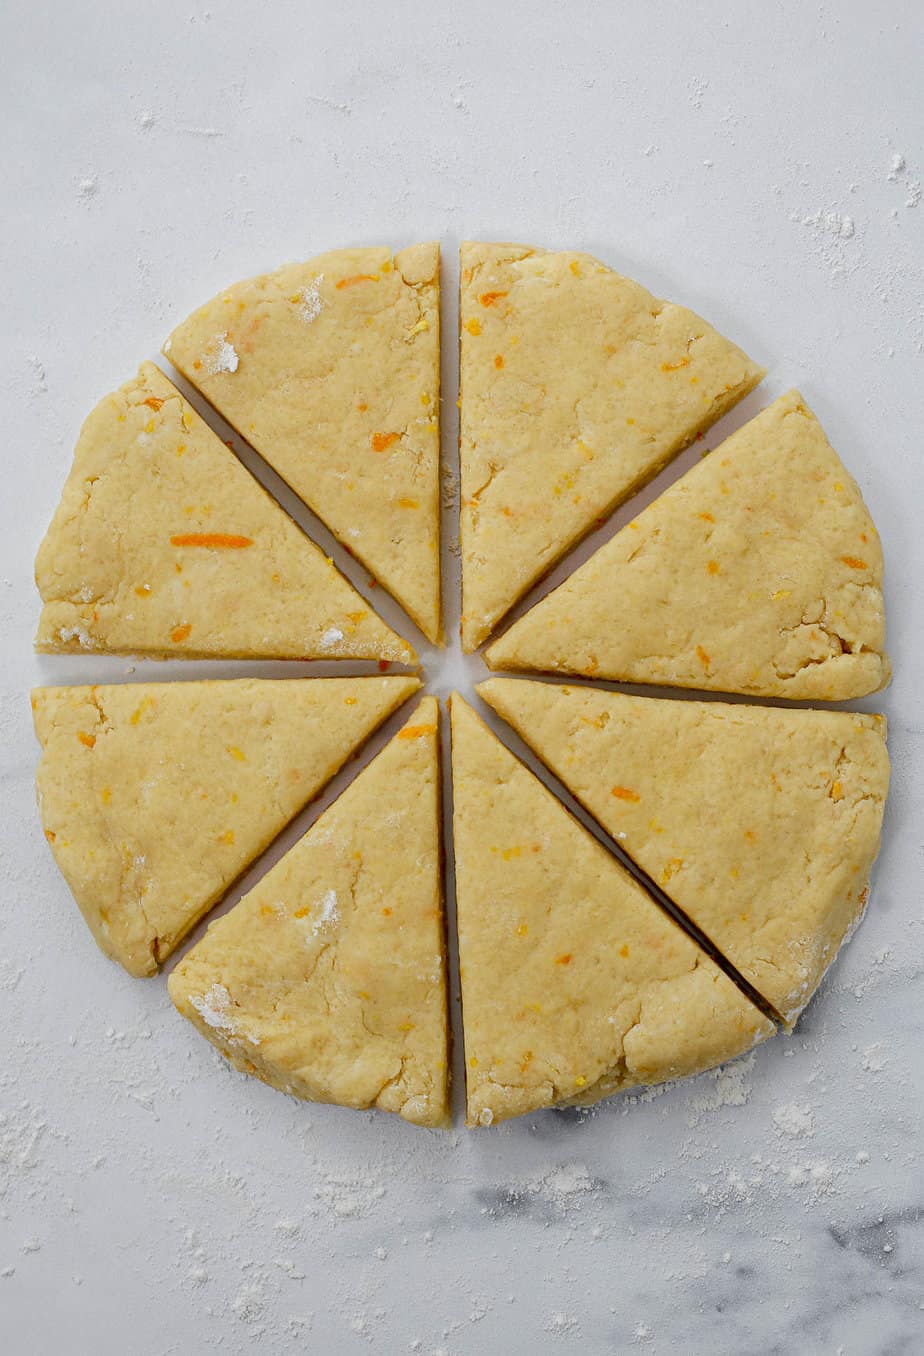
Step 6: Cut into 8 triangles and place on prepared baking sheet 2-3 inches apart.
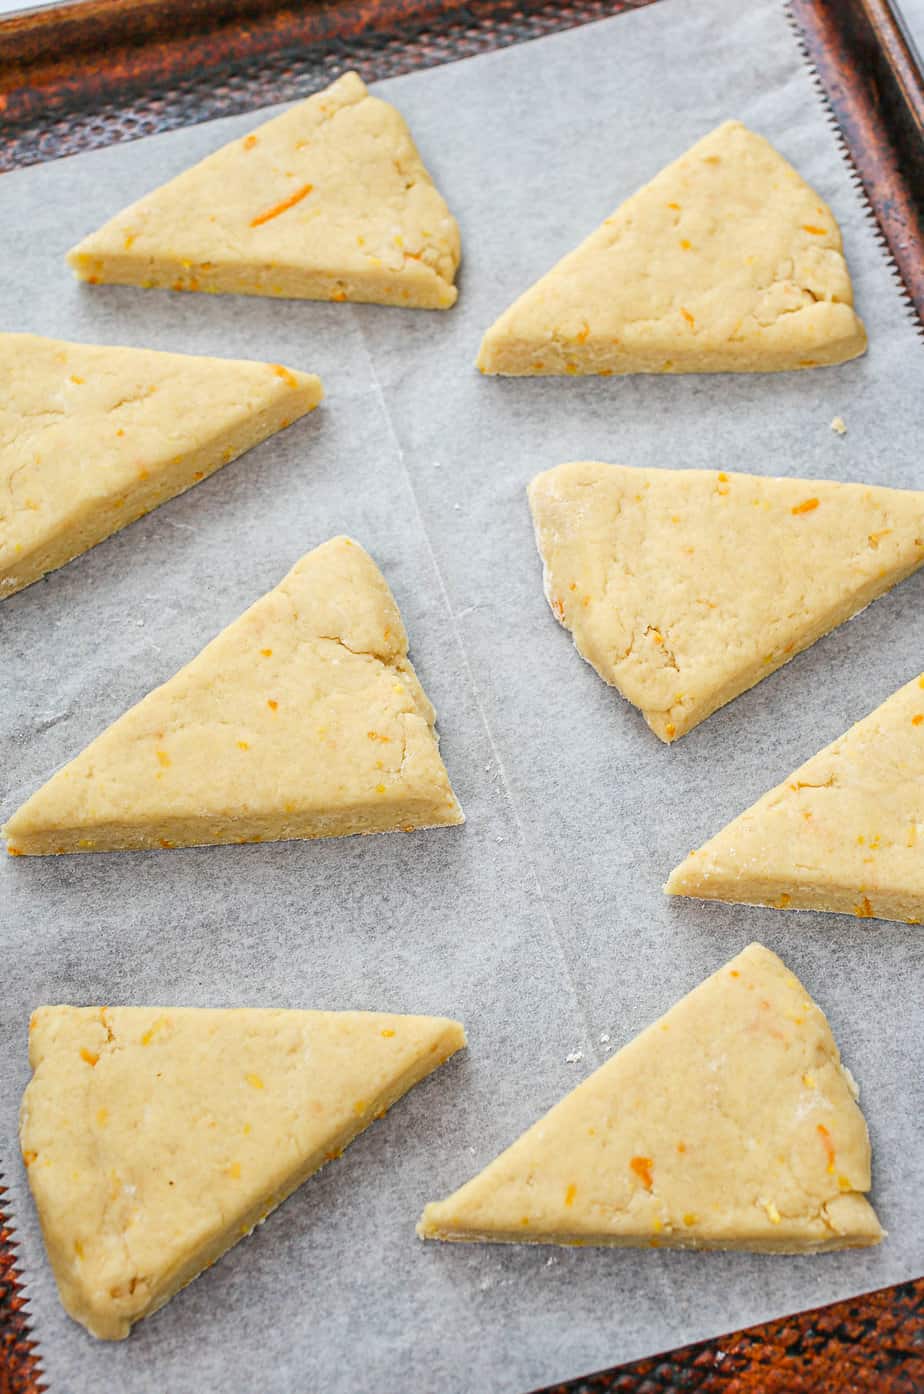
Step 7: Place scone dough triangles on a lined baking sheet 1-2" apart. Bake 15-17-minutes.

Step 8: Whisk glaze ingredients together until smooth. Dip cooled scones into glaze or drizzle it on.

Jessica's Recipe Tips
- Drizzle glaze on completely cooled scones. Warm scones will absorb the glaze making them too moist and soft. While still delicious, they won't have a dense, crumbly texture scones are known for.
Storage
- Store orange scones at room temperature for up to 3 days stored in an airtight container.
Freezing
- To freeze: Prepare the recipe all the way up until ready to bake. Push the scone dough triangles together into a circle loosely and wrap tight with a layer of plastic wrap and then a layer of foil. Place into a large resealable bag and freeze for up to 3 months. Bake from frozen on a parchment-lined baking sheet, separating the triangles slightly. Prepare glaze and drizzle on scones after baking.

Recipe FAQs
The main difference is that scones have eggs in the dough and biscuits do not. Other than that they are relatively the same.


Did you make this recipe?
Please leave a ⭐️ review below and tag @sprinkle_some_sugar on Instagram!
📋 Recipe
Fresh Orange Scones
Ingredients
Orange Scones
- ⅓ cup granulated sugar
- zest of one large orange or two medium oranges
- 2 cups all-purpose flour
- 1 teaspoon baking powder
- ¼ teaspoon baking soda
- ½ teaspoon salt
- ½ cup unsalted butter, frozen
- ½ cup sour cream
- 1 egg
Orange Glaze
- 3 tbs unsalted butter, melted
- 1 cup powdered sugar
- ½ teaspoon vanilla extract
- 2-4 tbs freshly squeezed orange juice
Instructions
- Preheat oven to 400°F and set oven rack to the middle position. Line a baking sheet with parchment paper, set aside.
- In a medium-sized bowl, gently toss flour, baking powder, baking soda and salt. Set aside. In a separate small bowl, whisk sour cream and egg until completely smooth. Set aside.
- In a large bowl, stir sugar and orange zest together until sugar is moistened and zest is evenly distributed. Pour in flour mixture and toss to combine.
- Grate cold butter into mixture. Using your hands, work in the butter until the mixture resembles a coarse meal. Gently stir in sour cream mixture until just about combined. Do not over work the dough! Very gently press the dough against the sides of the bowl a few times and form a ball. The dough will be sticky at first but will come together as you form it.
- Place dough on a lightly floured surface and lightly pat into an 8" circle about ¾" thick. Use a very sharp knife to cut into 8 triangles (like a pizza).
- Transfer triangles onto prepared baking sheet. You can arrange them in two rows, 4 in each row, or arrange them in a circle shape - leaving about 1" between each one.
- Bake scones for 15-17 minutes or until the tops begin to golden. Don't take them out too early or they will be too soft. Allow them to cool for 10 minutes on hot pan before transferring onto a wire rack to finish cooling completely.
Prepare fresh orange glaze
- Whisk together melted butter, confectioner's sugar, vanilla and orange juice until smooth. Once scones are completely cooled, go ahead and either dip the tops of the scones into the glaze or drizzle it on top with a spoon.
Notes
Nutrition
The provided nutritional information is an estimate per serving. Accuracy is not guaranteed.


Jessica says
You can follow the recipe and instructions as written up until the part where you cut them. You'll first cut them into 8 triangles and then cut them in half again to create 16 mini triangles. You'll need to adjust the baking time accordingly so I would start checking the scones at around 10 minutes or so and go from there. Hope this helps, Alisa!
Melody says
I roll mine into a rectangle and cut them in small squares. A large scone is too much to eat at one time. They come out fine but you will need to watch your baking time.
Shanna says
I would like to try these with lime, so I need a measurement for zest, please. Couple tablespoons?
Jessica says
I would say about two tablespoons of zest per (large) orange. Since limes tend to be very strong I would try one tablespoon first, taste the batter (if you feel comfortable doing so) and see if you should add more.
Jane says
These are truly FABULOUS!!! I read someone else's comment about also adding a little zest to the glaze, so I added about a tsp in with the glaze, and these are really, REALLY delicious!! I know I"ll be making these often! Thank you for sharing! :0)
Jessica says
Awesome, thanks for reporting back Jane!! I've got to try the zest in the glaze.
Nikki Jones says
Made these today and the whole family loved them! Definitely my new favorite scone. I wasn't sure that I would like the orange glaze on top, but I really did. The glaze makes these scones even better. Thanks so much for the recipe!
Jessica says
I felt the same way the first time I made these, being that I'm not a huge orange fan but these scones are our favorite! I'm so happy you and your family enjoyed them Nikki!
Silena says
you said it makes eight, but they look huge, would i be able to get 22 small ones out of them it seems like a whole lot of dough! or would you recommend doubling?
Jessica says
They are a little big, but now bigger than your average scone. when I make them I usually will make them this size and if I am feeding more people I will cut them in half to make two smaller triangles once they are baked (or you could do this before baking). If you want anymore than 16, I would recommend doubling because they would be way too small cutting them anymore than once.
corrie says
Just wanted to tell ya... I love this recipe! Found on pinterest and have made like 15 times already. Your original is my fav, but I've adapted to different flavors (maple brown sugar, lemon and strawberry chocolate chip!). My whole family just eats em up, they only last like 2 days I've my house..... Thank you!!
Jessica says
That's awesome, you're so very welcome!! Omg, maple brown sugar sounds AMAZING! What were your changes for that? I've got to try it!
Shannon says
I tried making these today, and I am not sure what I'm doing wrong but mine didn't come out like I think they should have. My first problem was that my dough was VERY sticky and never seemed to take the form of a ball. I added a little more flour hoping it would shape, but no luck. The peices were very hard to transfer to the baking sheet because the dough was so soft they fell apart. My glaze also never seemed to harden. Please help! The scones were very good even after I made them but not like Panera's. Thanks!
Jessica says
Hi Shannon, I'm very sorry these scones didn't turn out well for you. As per other reviewers and my own experience of making these more times than I can count, I've never had or heard of anyone having this problem. I'm not sure what could have went wrong. Could you possibly have measured the sour cream or flour incorrectly, resulting in the overly sticky dough? The dough should be slightly sticky but not sticky enough where it's a mess. I'm sorry I can't be much of help to you! It's hard for me to figure out what went wrong without being there in the kitchen with you. 🙁
Suneera says
Mine were very sticky as well as I was mixing the dough, but I left it alone for 10 minutes before I cut it, and it wasn't as sticky.
Vanessa says
I was having the same issue. After I patted mine out on a cutting board, with a liberal amount of flour to keep it from sticking, I put the dough in my freezer for about 10-15 minutes (before cutting it). This helped firm up the dough, so I could cut and transfer.
Jessica says
Great idea!
Tom says
The trick is to turn the crumbly sticky finished dough mixture onto a large piece of plastic wrap. Then wrap it and press to a flat 3/4 inch in the plastic. I chilled in the refrigerator overnight, but you could freeze it at this point also. It was still dry looking but by morning the flour was absorbed almost totally. Then I opened it up and cut into 8 and baked immediately. They were perfect and delicious at 15 minutes. The glaze is a little runny but can be thickened to your preference with a bit more confectioners sugar. Great recipe and it’s now part of my tool box, Thanks
Jessica says
Great trick!
Catherine says
This looks like a great recipe! Would I be able to substitute the sour cream for greek yogurt? I'm not sure if it would change the flavor or consistency.
Jessica says
Yes, you can definitely interchange those ingredients and it should be just fine in this recipe. Just be sure to use plain greek yogurt. 🙂
Renee says
Preheat at 400
Baking is ??
Jessica says
You bake at 400 degrees.
Michelle Hwee says
Wow those look delish! I never really tried to make scones before although this one would be amazing right now.. I love orange pastries, they are just so light, fragrant and fresh to me. I would love to try out your recipe for the holidays! It looks simple and easy to follow! I love your photos!!