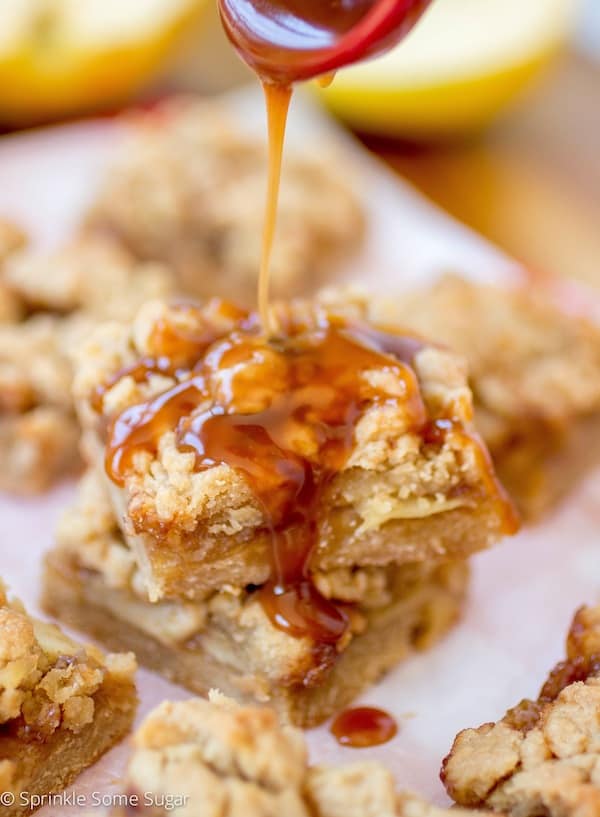
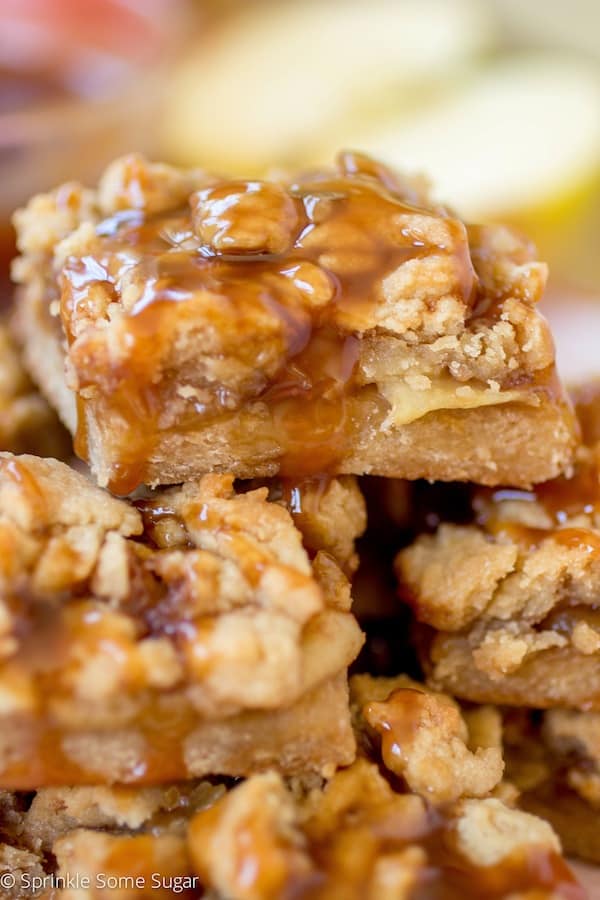
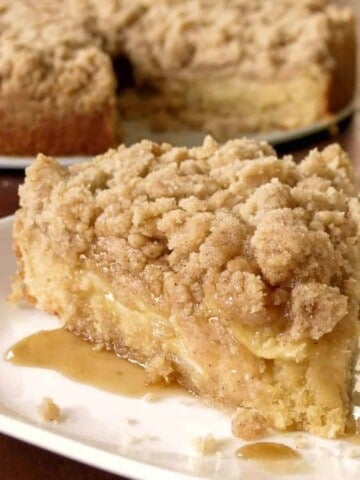
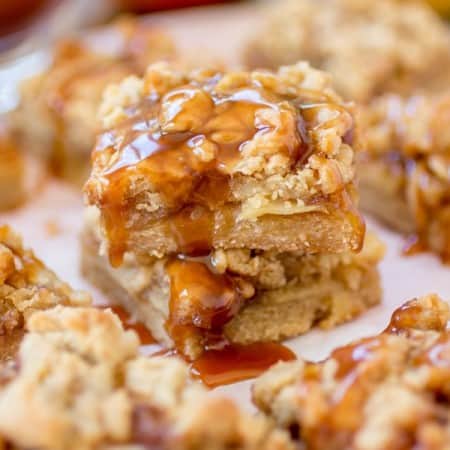
These Caramel Apple Shortbread Bars are filled with juicy apples coated in homemade caramel sitting on top of a buttery shortbread crust and topped with a buttery crumbly topping.

Looking for a delicious dessert that perfectly captures the flavors of fall? Look no further than these caramel apple shortbread bars. Combining classic flavors of apple pie with the rich indulgence of homemade caramel, these bars are the perfect dessert for any occasion. With a buttery and flaky brown sugar crust, a sweet and spiced apple filling, and a decadent caramel drizzle, they're always a crowd pleaser whenever I make them!
Why you'll love this recipe
- There's nothing like homemade caramel sauce! It's easier than you think to make at home.
- The buttery brown sugar topping and crust are made from the same dough so it's super simple to make!
Ingredients
- 3 apples: Use your favorite kind. I recommend Granny Smith for a tart option and Honeycrisp for a sweet option! Sometimes I like to do a mixture of the two.
Homemade Caramel Sauce
Making homemade caramel sauce will elevate this recipe and take it to the next level. If you do not want to make homemade caramel sauce, you can use 1 ¼ cup of store-bought.
- Granulated sugar
- Water
- Heavy cream
- Unsalted butter
- Vanilla Extract
- Salt
Crust & Crumble Topping
The crust and crumble topping are made from the same dough making these such an easy dessert!
- Light brown sugar
- All-purpose flour
- Unsalted butter
- Vanilla extract
- Egg
See recipe card below for a full list of ingredients and measurements.
Substitutions & Variations
- Try using pears in place of apples for a delicious pear version.
- Sprinkle flaky sea salt on top of bars before serving.
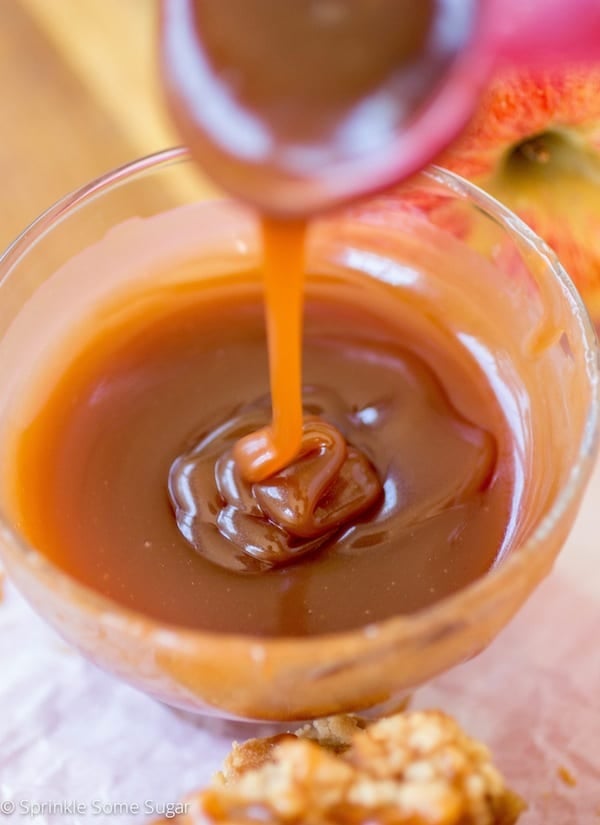
How to Make Homemade Caramel Sauce
This caramel recipe makes about ½ cup of caramel sauce. Half will go into the filling and the other half drizzled on top.
How to make Caramel Apple Shortbread Bars


Recipe Tips
Allow bars to cool completely before cutting into squares for clean cuts.
Storage
Store caramel apple pie bars at room temperature in an airtight container for up to 3 days.
Freezing
Slice into bars and separate each bar with a piece of parchment paper in between each one. Store in an airtight container that is freezer-safe. Freeze for up to 3 months. Thaw overnight in the refrigerator and then come to room temperature before serving.
Recipe FAQs
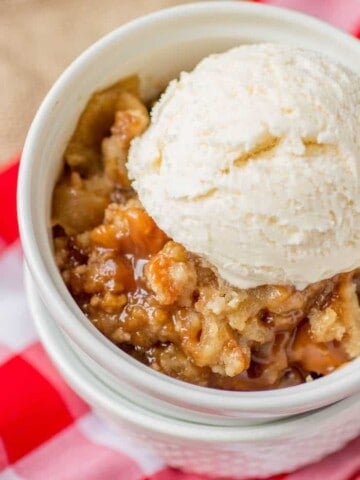
If you want clean cut bars, then yes. I would even recommend refrigerating them for a little while. Sometimes I like to serve these bars warm so the caramel oozes out with a scoop of vanilla ice cream on top. It all depends how you want to serve them.
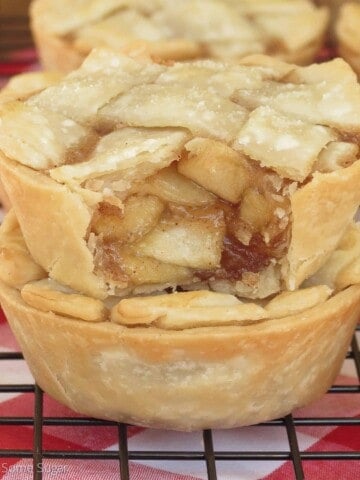
More apple recipes you'll love
📋 Recipe
Caramel Apple Shortbread Bars
Ingredients
- 3 granny smith apples or kind of choice, peeleed, cored & sliced thin
Homemade Caramel Sauce
- 1 cup granulated sugar
- ¼ cup water
- ¾ cup heavy cream
- 3 tbs unsalted butter
- 1 teaspoon vanilla
- pinch salt
Crust & Crumble Topping
- 1 cup light brown sugar
- 3 cups all-purpose flour + 3 tbs divided
- 1 cup unsalted butter cut into chunks and softened
- 1 teaspoon vanilla extract
- 1 egg
Instructions
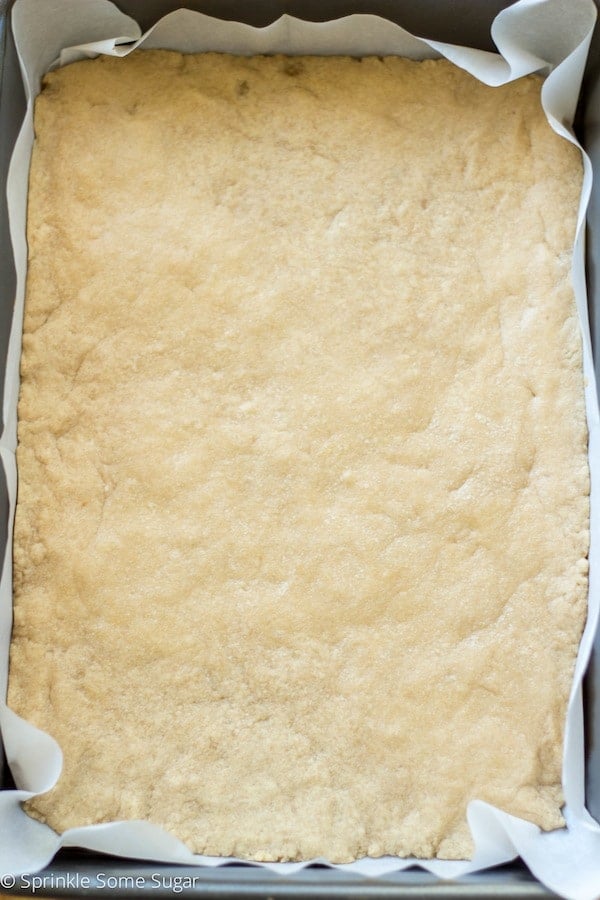
- Preheat oven to 350 degrees and line a 9x13" pan with parchment paper or grease very well.
For the caramel sauce
- *If you would like to use store-bought caramel sauce, you will need 1 ¼ cup*
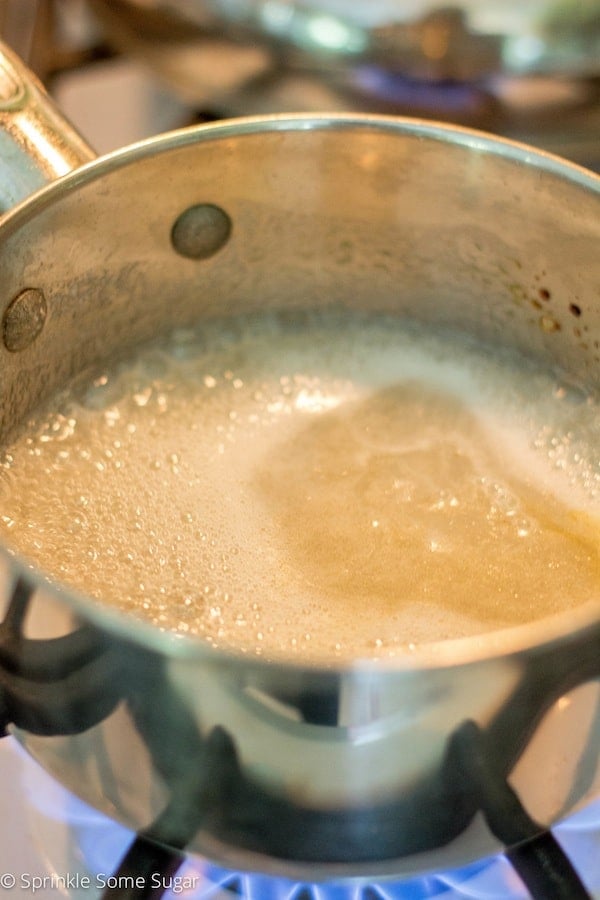
- In a medium-sized heavy bottomed pot, heat water and sugar on HIGH heat and whisk just until the sugar is dissolved. It's important that you have high heat or you run the risk of seizing up the sugar, turning it into a solid mess.
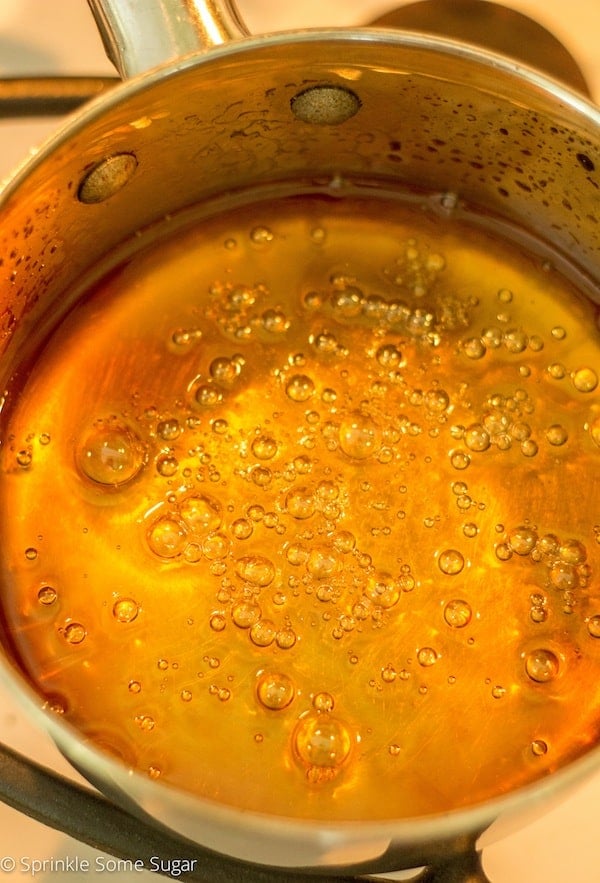
- Once sugar is dissolved, whisk gently and constantly until the melted sugar turns a dark amber color, this will take about 5 minutes or so. The darker the amber color, the more intense caramel flavor you will have.
- After it turns dark amber, slowly and carefully pour in heavy cream. It will bubble up violently so you will need your whisk to whisk it very fast until it comes back down and it will start looking like caramel at this point. Remove from heat and stir in butter and vanilla. Allow to cool down a bit and thicken.
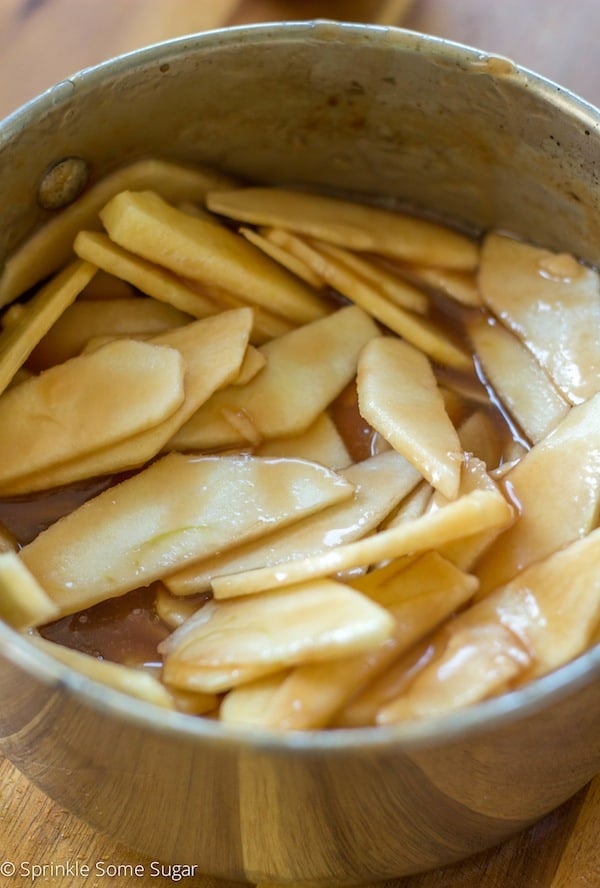
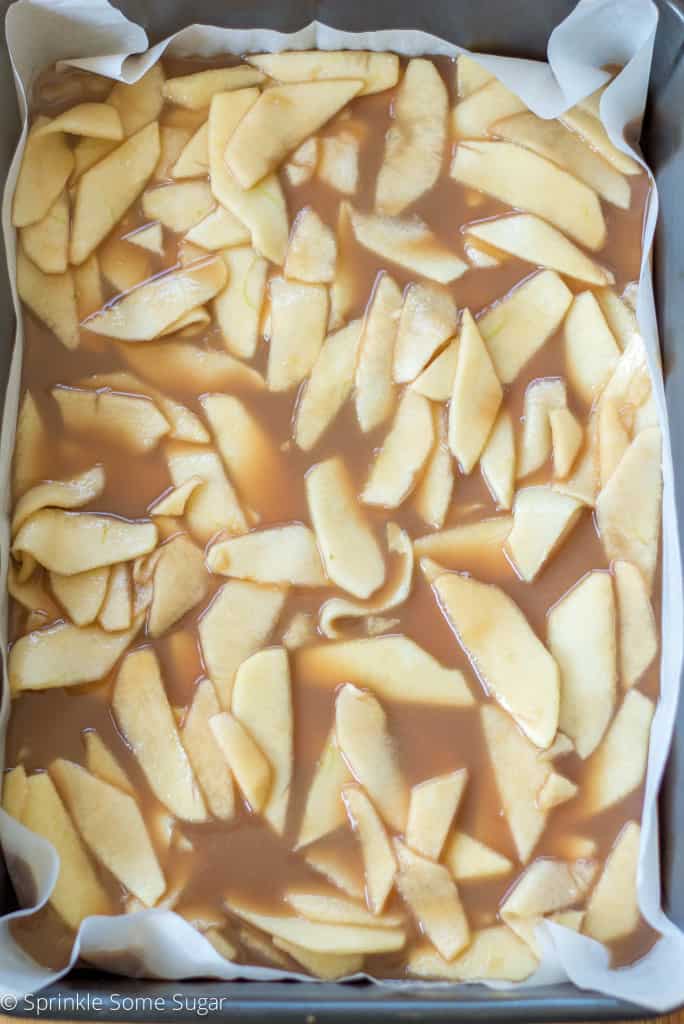
- Slice apples very thin. Reserve a ⅓ cup of caramel and set it aside for drizzling after the bars are baked. Place apples in the pot of warm caramel and stir to coat. Allow them to sit and tenderize and soften slightly while you prepare your crust/crumble.
For the crust & crumble topping
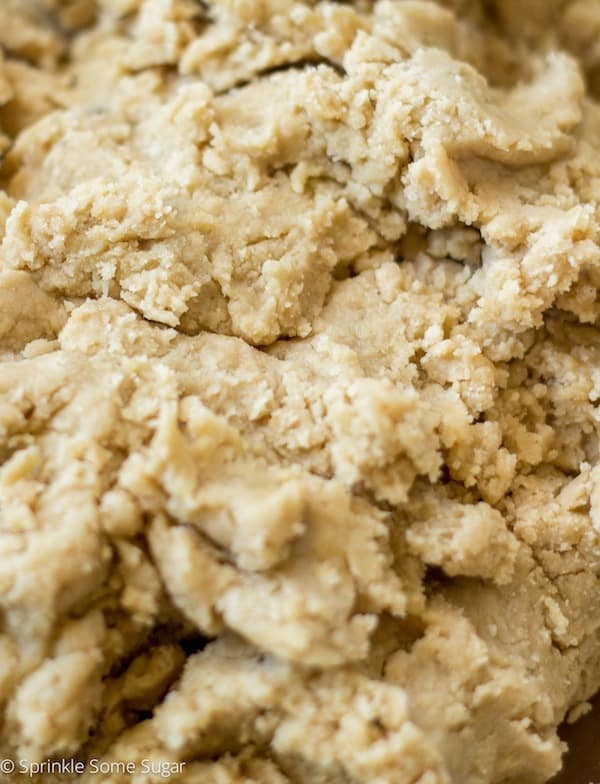
- In a large bowl, stir 3 cups of flour and brown sugar together. *RESERVE the remaining 3 tablespoons of flour for later in the recipe.* Slowly cut in butter until a coarse texture is achieved. Add egg and vanilla and beat until fully combined. Your mixture should have a dough-like texture. Take ⅔ of that dough and press it into prepared pan into an even layer for the crust. Bake crust for 10 minutes.
- Pour caramel and apples over warm crust. The caramel may have thinned out a lot from the apples releasing their juices, not to worry because it will thicken back up from the heat of the oven.
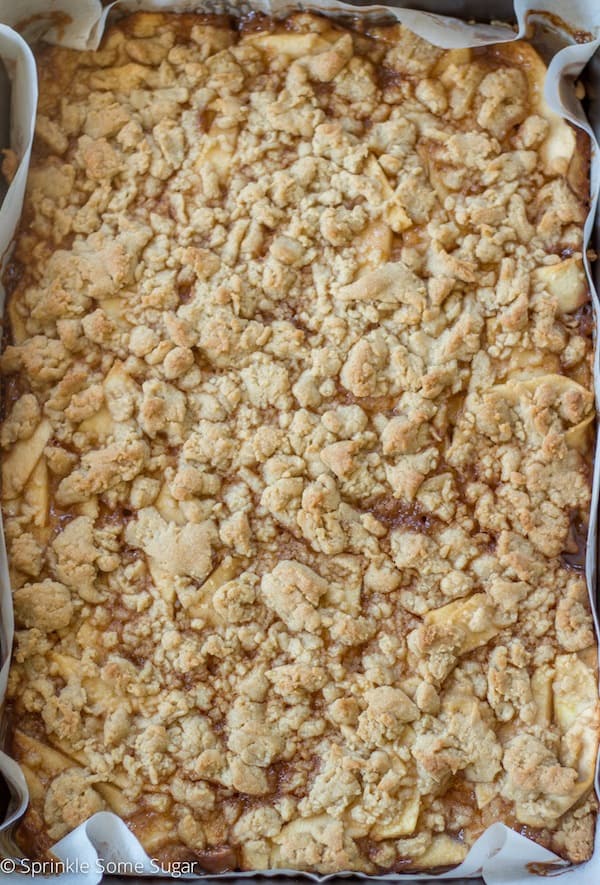
- Take the remaining dough and add 3 tbs of flour to it to loosen it up. You can use your hands or a mixer. Sprinkle it on top of the caramel apples trying to get as much of the surface as you can. There will be some spaces left uncovered.
- Bake bars for 35 minutes or until the caramel starts firming up and the top is lightly golden. Allow to cool before cutting into bars for at least an hour. Serve with reserved caramel drizzled on top.
- Caramel Apple Pie Bars will stay fresh for 3 days stored at room temperature in an airtight container.
Notes
- If using store-bought caramel sauce, you will need 1 ¼ cup for this recipe.
- Storing instructions: at room temperature in an airtight container for up to 3 days.
- Freezing instructions: Slice into bars and separate each bar with a piece of parchment paper in between each one. Store in an airtight container that is freezer-safe. Freeze for up to 3 months. Thaw overnight in the refrigerator and then come to room temperature before serving.
The provided nutritional information is an estimate per serving. Accuracy is not guaranteed.

J says
These look delicious. I do not see the amounts for the caramel sauce. I looked it up on your website and I couldn't find it. Please post.
Thanks
Jessica says
The recipe is updated with the correct ingredient amounts. Thank you SO much for pointing that out!